Organize Content into an Outline
Created On September 04, 2023
Last Updated On September 04, 2023
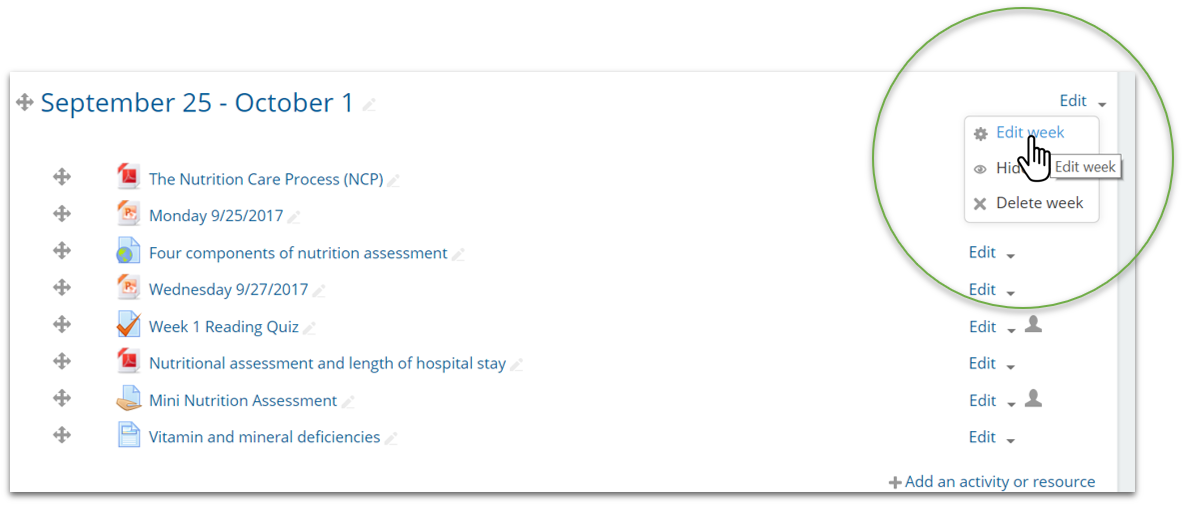
Organizing your course content into an outline helps students quickly understand what they will be doing each week. It can also help you as the instructor stay organized. As an example of how you might use an outline, see the screenshots below. The first picture shows that the section has not been organized. On the second one, the section has a description and each resource or activity is organized into categories.
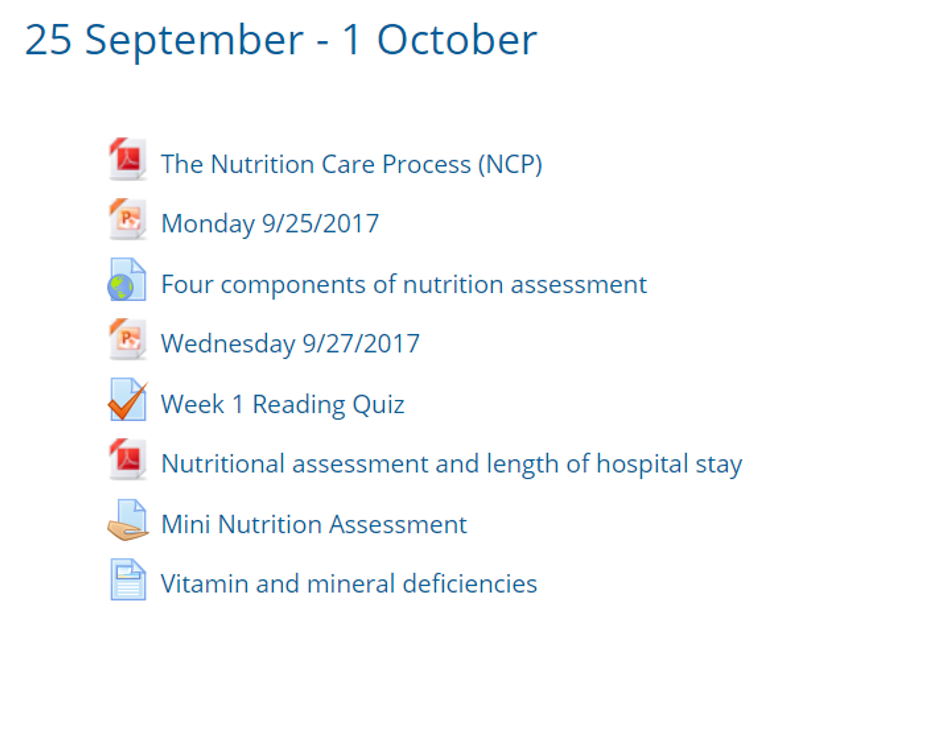
Default content on a page

Content has been organized into an outline
Part 1
EDIT THE WEEK SETTINGS
- Go to the week you want to organize.
- Select Edit week from the "Edit" drop-down.
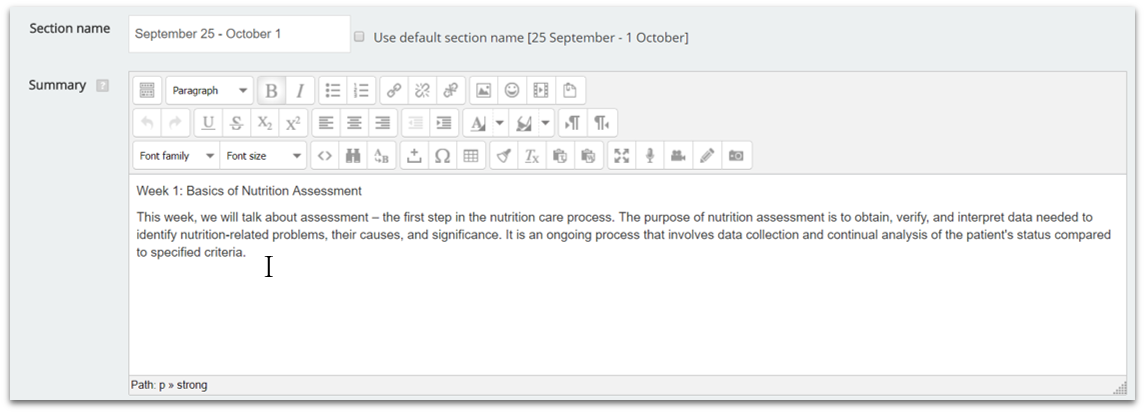
- In the "Section name" area, uncheck the "Use default section name" box and type in the dates as you want them to appear on your course page.

- In the "Summary" area, type in the description you want to appear on the main course page
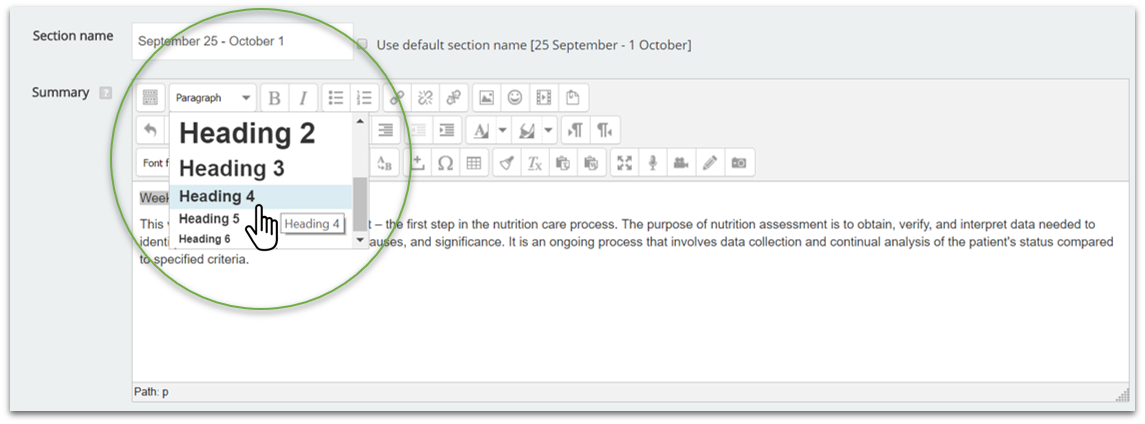
- Use the "Format" drop-down to increase the size of the week’s topic to make it stand out (I used Heading 4).
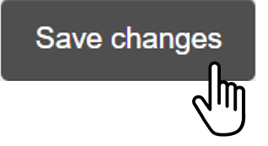
- Click Save changes.
Part 2
ADD LABELS
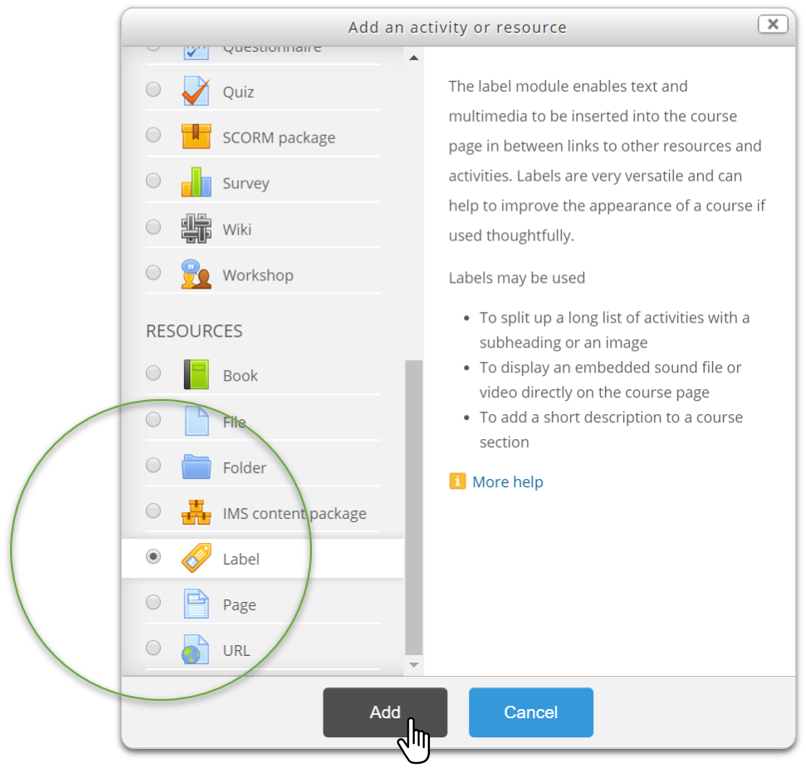
- Click Add an activity or resource.

- From the list of available resources, select Label and click Add.
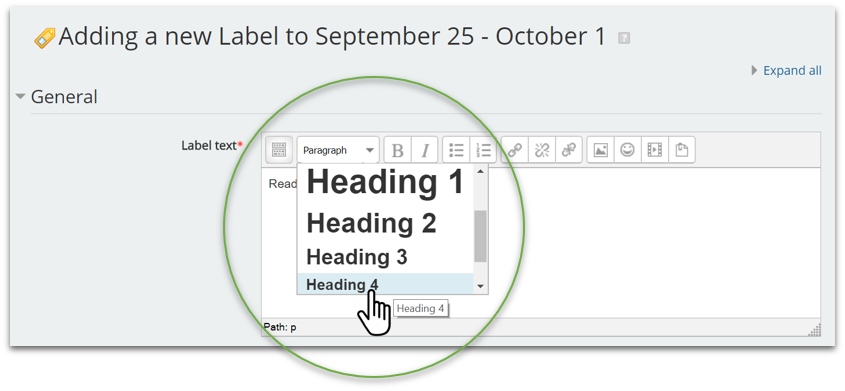
- In the "Label text" area, add the name of the label as you want it to appear on the main course page. You can use the "Format" drop-down to increase the size of the text (I used Heading 4).
- Click Save and return to course.
- Repeat the steps above to add more labels.
Part 3
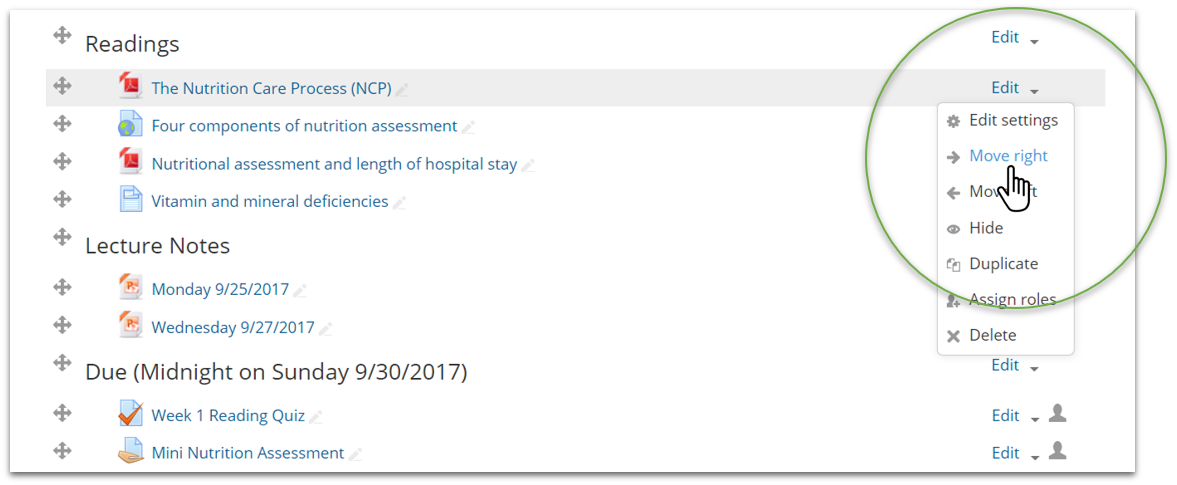
REARRANGE AND INDENT CONTENT
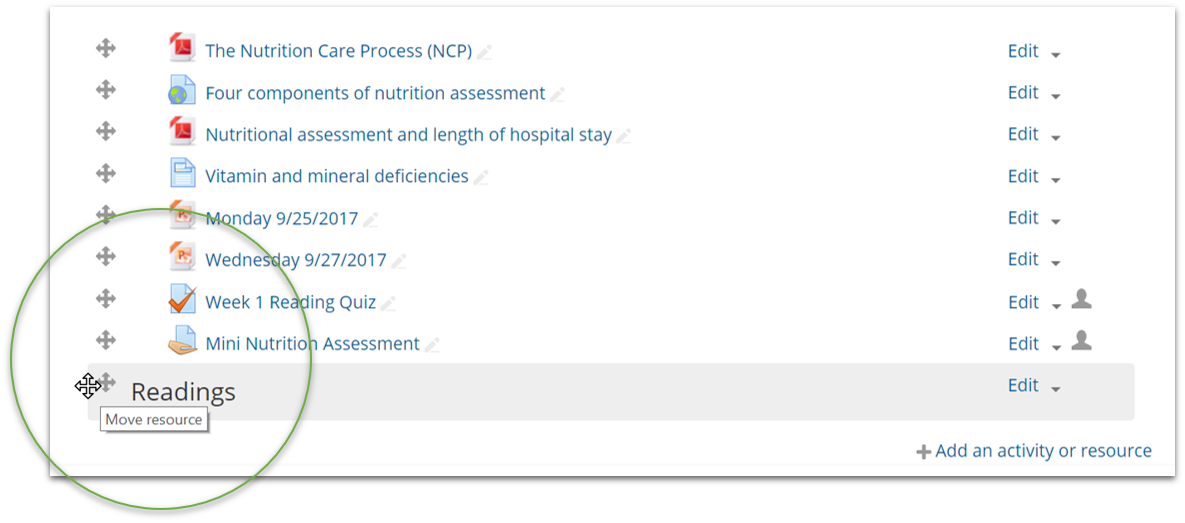
- Use the move tool to rearrange the different resources and activities.
- Indent your activities and resources (except the labels) by clicking Move right from the "Edit" drop-down.
arrow_right_alt
Go back all guides